

How Do You Set Up a Complete Ophthalmic Exam Lane from Scratch?
You have the space and the budget. You do not have a clear picture of what goes where, in what order, or what combinations actually work together. That gap costs new clinic owners months of inefficiency.
A complete ophthalmic exam lane requires a minimum of five device categories: visual acuity testing (chart projector or LCD vision chart), refraction (auto refractometer and phoropter or refraction unit), slit lamp examination, IOP measurement (tonometer), and a motorized instrument table to mount and organize the equipment. The sequence and spacing of these devices determines workflow speed and patient experience.
Getting the lane layout right at setup is far cheaper than redesigning it after opening day.
What Are the Essential Devices in a Full Diagnostic Exam Lane?
Every ophthalmic exam lane has a required function set. Missing any one category creates diagnostic gaps that force workarounds or referrals that should not be necessary.
A complete diagnostic exam lane requires: a vision chart or projector for visual acuity; an auto refractometer for objective refraction measurement; a manual or auto phoropter for subjective refraction; a slit lamp for anterior segment examination; a tonometer for IOP measurement; and a motorized ophthalmic table to organize the workspace. These six elements cover the full primary eye examination workflow.
Device-by-Device Breakdown
Vision Chart / Chart Projector — The starting point of every refraction exam. LCD digital vision charts have largely replaced mechanical projectors in new setups because they offer programmable test sequences, larger character libraries, and integration with electronic refraction systems. The optotype display distance should be matched to the room length — typically 5 meters or 6 meters.
Auto Refractometer — Provides the objective starting point for the refraction. A good auto refractometer reduces subjective refraction time by giving the examiner a precise baseline measurement. Features to look for: touch screen interface, auto-capture capability, short test time, and pupillometry function if needed.
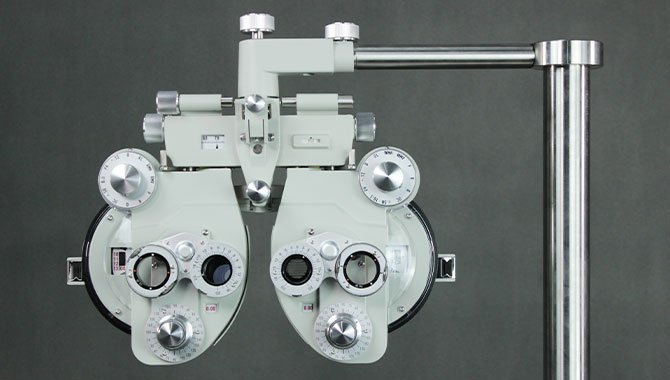
Phoropter (Manual or Auto) — The subjective refraction instrument. Manual phoropters are lower cost and adequate for skilled refractionist. Auto phoropters (automated refraction heads) integrate with the vision chart and auto refractometer for a connected refraction workflow. For new clinics prioritizing patient throughput, the auto phoropter significantly reduces chair time per patient.
Slit Lamp — The primary anterior segment examination tool. For a general exam lane, a standard desktop slit lamp with 3-step or 5-step magnification is appropriate. Adding an imaging module (Phonto or Phoenix) enables documentation from day one.
Tonometer — IOP measurement for glaucoma screening and monitoring. For a general exam lane, the NCT provides the most efficient workflow. Clinics with a glaucoma specialization should add a slit-lamp-mounted applanation tonometer.
Motorized Instrument Table — The physical platform that organizes the exam lane. A motorized table with height adjustment allows the examiner to position the slit lamp and tonometer at the correct working height for each patient — reducing examiner fatigue and improving patient positioning.
How Do Refraction Units and Motorized Tables Fit the Workflow?
The ophthalmic refraction unit and motorized table are the physical backbone of the exam lane. Their configuration determines how smoothly the rest of the workflow operates.
An ophthalmic refraction unit combines the patient chair, instrument arm, and mounting positions for the slit lamp, tonometer, and phoropter into a single integrated platform. A motorized table provides vertical adjustment to accommodate examiners and patients of different heights. Together, they define the ergonomic standard of the exam lane and directly affect examiner fatigue and per-patient exam time.
Refraction Unit Configuration Options
- Single-instrument-arm units — The slit lamp and tonometer share a single swing-arm. This is the most space-efficient configuration for small rooms.
- Dual-instrument-arm units — Separate arms for the slit lamp and tonometer. Faster switching between instruments during examination.
- Combined chin-rest units — A single chin rest serves both the refraction measurement and the slit lamp examination without the patient repositioning.
For clinics seeing 15+ patients per day, minimizing patient repositioning between instruments saves 2–4 minutes per examination. Over 20 patients, that is 40–80 minutes of recovered examination time daily.
Motorized vs. Manual Height Adjustment
Manual height-adjustment tables require the examiner to crank or release a lever to reposition. Motorized tables allow one-touch height adjustment, which matters when the examiner is switching between patients of very different heights (adult vs. child, wheelchair user vs. standing patient). The time difference is small per patient but meaningful over a full clinical day.
How Do You Plan Space and Ergonomics for a Functional Exam Lane?
Space planning is the most undervalued part of exam lane setup. Poor spatial planning creates a lane that technically has the right equipment but physically cannot be used efficiently.
A functional ophthalmic exam lane requires a minimum room length of 5 meters (for chart projection distance), a minimum width of 2.5 meters (for examiner movement around the instrument table), and ceiling height sufficient for standing patient measurements. Power outlets should be placed on both sides of the instrument table to avoid trailing cables. Equipment should be positioned to allow the examiner to transition from slit lamp to tonometer to refraction without asking the patient to move.
Space Planning Checklist
| Factor | Minimum Requirement | Recommended |
|---|---|---|
| Room length | 5 meters (for 5m chart distance) | 6 meters |
| Room width | 2.5 meters | 3 meters |
| Power outlets | 2 per side of instrument table | 4 (to avoid extension cords) |
| Lighting | Dimmable (for slit lamp use) | Dual zone (bright / dark) |
| Door width | Standard (80 cm) | 90 cm for wheelchair access |
| Flooring | Non-slip, cleanable | Anti-static near electronic equipment |
The instrument table height in the working position should place the slit lamp eyepiece at a height where the examiner can sit comfortably without hunching. Musculoskeletal strain from poorly positioned equipment is a significant cause of early career interruption for ophthalmic clinicians. Adjustable motorized tables that accommodate examiners from 155 cm to 195 cm solve this problem permanently.
What Is the Realistic Budget for a Starter vs. Full Exam Lane Setup?
Budget planning for an exam lane needs to be realistic about the difference between a functional starter setup and a fully optimized clinic room.
A starter exam lane with essential functionality — basic vision chart, auto refractometer, manual phoropter, standard slit lamp, and rebound tonometer — can be established at a significantly lower cost than a full setup. A complete lane with digital vision chart, auto phoropter, digital slit lamp with imaging module, NCT, motorized instrument table, and auto perimeter represents the full clinical capability. The upgrade path between starter and full is well-defined, so a new clinic does not need to buy everything at once.
Staged Setup Approach
| Stage | Equipment Added | Clinical Capability Gained |
|---|---|---|
| Stage 1 (Launch) | Vision chart, auto refractor, manual phoropter, slit lamp, rebound tonometer | Full primary eye examination |
| Stage 2 (Growth) | NCT, motorized instrument table | Faster IOP screening, improved ergonomics |
| Stage 3 (Expansion) | Auto phoropter, digital imaging module | Faster refraction, telemedicine capability |
| Stage 4 (Specialist) | Auto perimeter, OCT | Glaucoma management, retinal assessment |
A clinic at Stage 1 can see patients and generate revenue from day one. Each subsequent stage adds either efficiency (more patients per day) or clinical scope (new billable services). Presenting this roadmap to a new clinic buyer positions you as a long-term partner rather than a one-time equipment supplier.
Conclusion
A complete exam lane needs six device categories: vision chart, auto refractometer, phoropter, slit lamp, tonometer, and instrument table. Space planning — minimum 5 m length, 2.5 m width, dimmable lighting — determines whether the equipment works as a system. Stage the purchase to match patient volume and revenue growth. A defined upgrade path from starter to specialist setup builds a long-term customer relationship.